A few days ago a security advisory was published, which describes vulnerabilities in VMware Tools and provides information which versions of VMware Tools contain the necessary fix.
Only Windows based systems and their tools are affected.
Therefore, I would like to describe a way to make it easier to keep the VMware tools in the environment up to date.
A widely known possibility is to initiate an update via the vCenter. For this, a single VM can be selected and an update process can be started. In the meantime, there are also other possibilities to plan an update over a larger area and, for example, to perform it automatically when the virtual machines are rebooted.
If you choose this way, the version of the tools that comes with the ESXi will always be used for the update. An overview of the tools in the respective ESXi releases can be found here.
It has to be said that the release cycle of the tools has been detached from that of the ESXi hosts for some time now and therefore the latest versions are not always available in the ESXi, or more precisely the local VMware Tools locker.
To use the known functionality with the current tools there is the possibility to create a shared directory, which I will explain in this post.
First, you need to create a shared directory that must be accessible from the ESXi host in the environment/cluster. For this you can use e.g. the Datastore Browser in vCenter
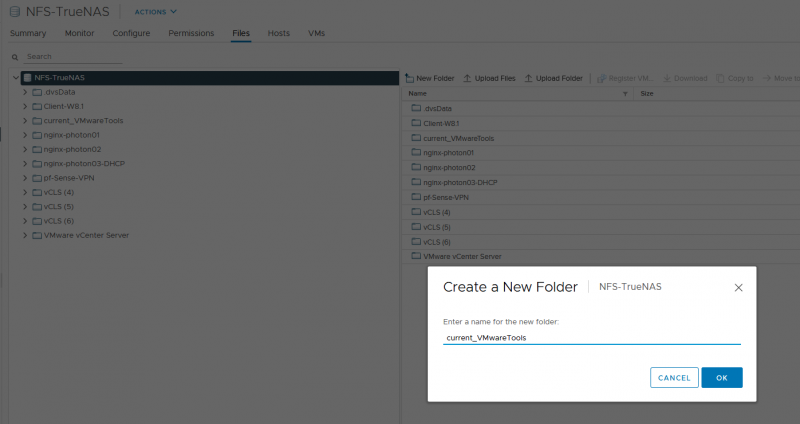
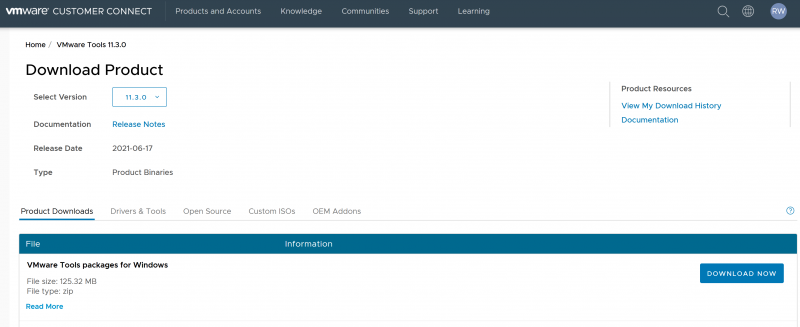
Into this directory you copy the content of the current tools, or the target version for your environment. The necessary files can be found in the ZIP file of the VMware Tools in the Customer Connect Portal

Now that the directory is prepared, we need to change the setting on the ESXi host.
There is the possibility to do this manually via the MOB, which is described here.
My approach in this post is to do it via PowerCLI.
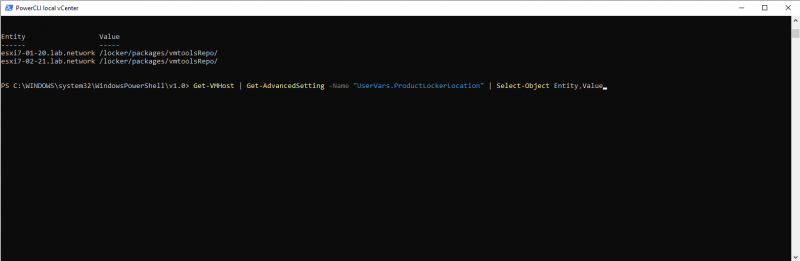
First we check the current setting with this command:
Get-VMHost | Get-AdvancedSetting -Name "UserVars.ProductLockerLocation" | Select-Object Entity,Value
To quickly customize the directory, the following command is sufficient:
Get-VMhost -Name <target> | %{$_.ExtensionData.UpdateProductLockerLocation_Task("/vmfs/volumes/NFS-TrueNAS/current_VMwareTools/")}
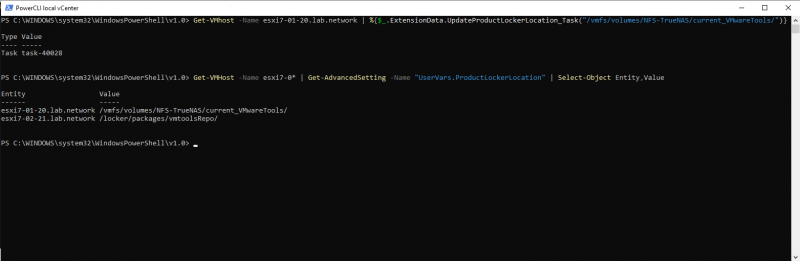
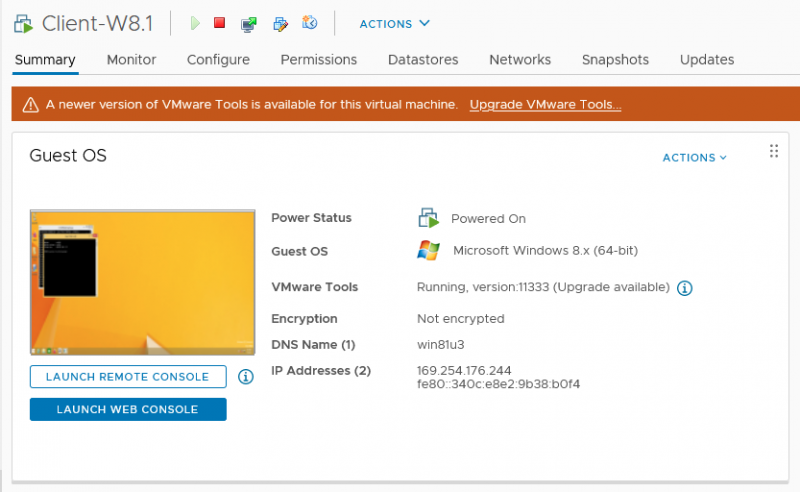
After this, the tools for the VM(s) on the changed host were directly displayed as outdated.
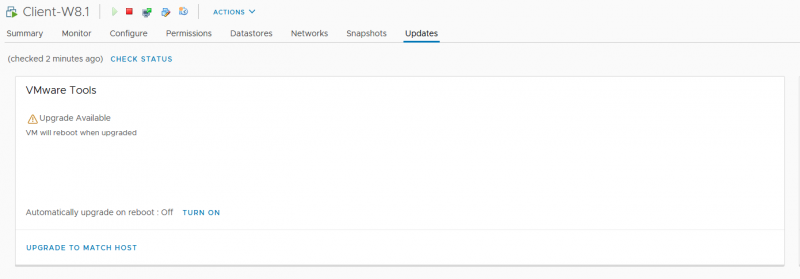
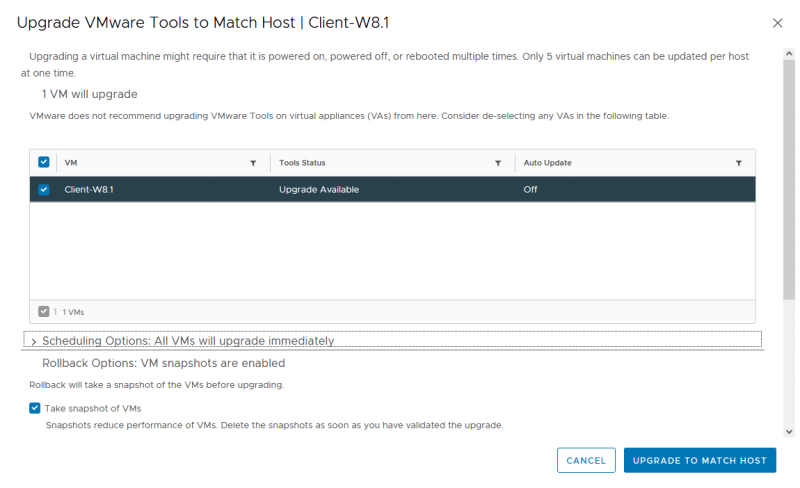
Next, you can directly schedule or perform the update for the single VM, or multiple VMs. To do this, use the Upgrade Scheduler of the vCenter.
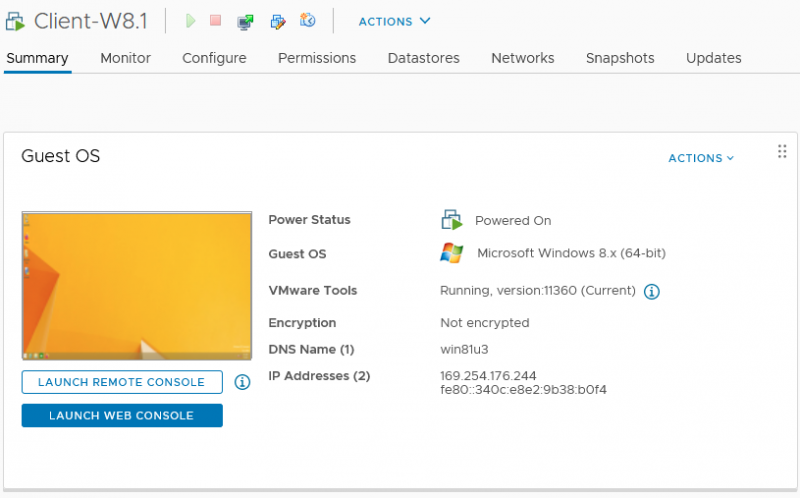
After the update of the tools is executed, they are finally displayed as up-to-date:
More Information:
https://www.vmware.com/support/packages.html
https://blogs.vmware.com/vsphere/2019/01/configure-a-vmware-tools-repo-in-vsphere-6-7u1.html