In the first part we have created requirements for accessing the own network from outside with OpenVPN. After the installation of the VPN server we will create the necessary certificates and prepare a VPN client with the help of pfSense. This will be used later in the nested VMC environment to be able to build a site-to-site VPN.
Step 4 – “Open the pod bay doors, please, HAL.”
With PiVPN it is very easy to create an .ovpn file with which the connection is quickly configured in pfSense. For this we execute the commandpivpn -a nopass
command.
You can choose the name of the client yourself, just like the desired validity of the certificate. The process takes just a few seconds.

Now two configuration files should be adjusted. First, enter a route in the server.conf of the server so that the tunnel device knows later that traffic for this network should be sent via the TUN device.
Execute the command:echo 'route remote-network-adress Netmask' | sudo tee -a /etc/openvpn/server.conf
So for exampleecho 'route 192.168.128.0 255.255.255.0' | sudo tee -a /etc/openvpn/server.conf
Now runsudo systemctl restart openvpn.service
to restart the service. Withip route
you should now see the new route pointing to tun0.
The important thing here is that the site in the cloud does not use the same IP range as your local network.
Then change the client specific configuration which was created automatically:echo 'iroute remote-network-adress netmask' | sudo tee -a /etc/openvpn/ccd/Iamonit-Blog
example:echo 'iroute 192.168.128.0 255.255.255.0' | sudo tee -a /etc/openvpn/ccd/Iamonit-Blog
The mapping between client and file is done using the Common Name (CN) specified in the client certificate and the file name.
The iroute option tells OpenVPN Server that packets for the specified destination network should be transmitted via the tunnel to the corresponding client.
Step 5 – It’s alive! It’s alive!
Now it is time to deploy pfSense and configure it with the created certificate.
For those who don’t know, pfsense is a FreeBSD based firewall distribution which can be used for different use-cases. Here I use pfSense as OpenVPN client and later as firewall between the cloud and my local environment.
After downloading the community edition, I created a virtual machine in my home lab. You can find the guide here. My specifications of the VM:

The downloaded iso needs to reside on an ESXi datastore and must be attached at startup of the VM.
After that, the installation goes quite quickly in a few steps (actually i did it quick and dirty with all the default settings):


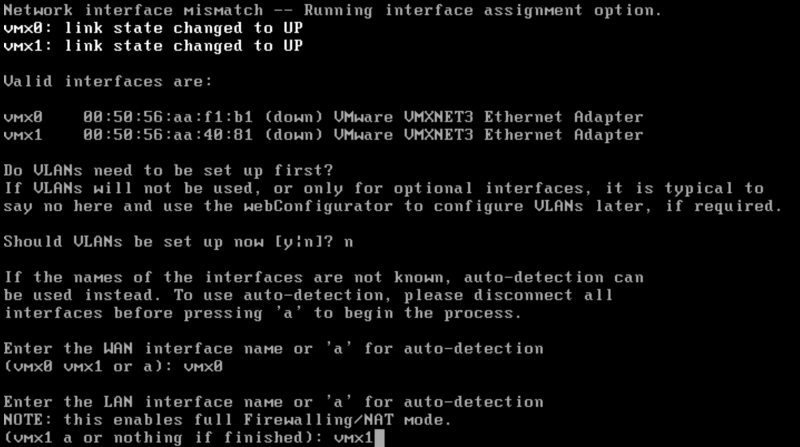
After the reboot it was necessary to assign the interfaces to the virtual NICs. Just check the MAC addresses to assign the correct NIC to the pfSense interface.
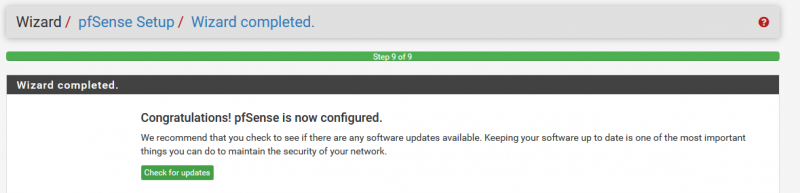
After another reboot, the initial configuration is complete and you can continue in the WebConfigurator. To do this, simply call up the IP address you assigned on the LAN interface with a browser. You need to go trough the Option “2” for the setup.

You need to go through the steps to configure NTP, DNS settings, and of course the admin password. I left the settings for the WAN interface at the default settings and after a few clicks the configuration was finished.
Next, log in to the created VM and go to System -> Certificate Manager. Under the item CAs you import the information from the OVPN profile you created before with PiVPN (Part 1 – Step x), the part between <ca> and </ca> is required.

Then add another certificate under the Certificates item. Use the content <cert> and <key> . Important: If you have created the OVPN profile without the -a nopass parameter, you will get an error message here when inserting the key.
Now you can finally configure the VPN client. Go to the submenu VPN -> OpenVPN -> Clients and add a new client via Add button.
The interface is left on WAN, the host address and the server port is adjusted to the information from the OVPN profile.

The cryptographic settings also come from the profile. I have disabled the NCP here and set the encryption algorithm fixed.

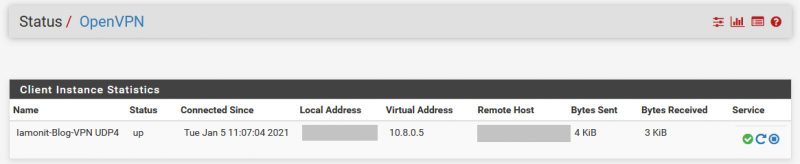
After you press save the client will be activated and it will try to connect. You can check whether this worked under the item Status -> OpenVPN. The connection should be also visible on the Raspberry when you run the command pivpn -c
End of Part 2
So now we have finished part two. In this part we created OpenVPN profiles on the RaspberryPi, created a VM to use pfSense and rolled it out in our own local home lab. We also configured pfSense so that a tunnel to the VPN server could be established.
In the next part, we will move the VPN client to the cloud and complete the settings to connect to the systems behind it.