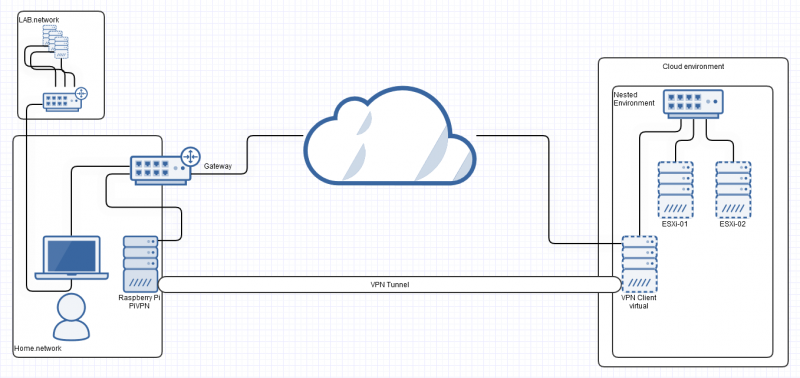
In the previous part, we enabled VPN access and configured a tunnel.
Now we will move the client to our nested environment in the cloud and configure access from the home lab to systems behind the client.
Step 6 – Keep your friends close, but your enemies closer.
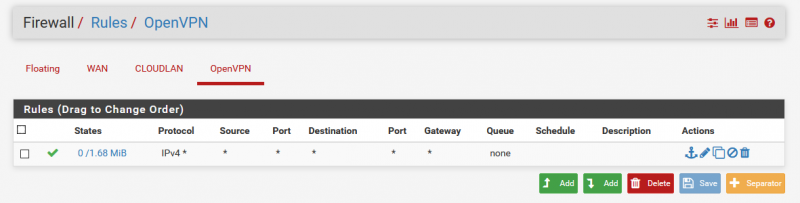
Before the VM is moved from the lab to the cloud, some configurations are necessary without which the access will not succeed. I did the rest of the configuration by accessing via VPN endpoint IP, also 10.8.0.x depending on your setup. First, I set up a “forward-all” rule for the OpenVPN interface. A customization for ports and protocols is also possible here and should be adapted to the own environment:
To allow the different networks to communicate with each other, I created appropriate NAT rules. Again, it depends on your setup. In addition, I have created another set of rules to be able to access my home network if necessary:
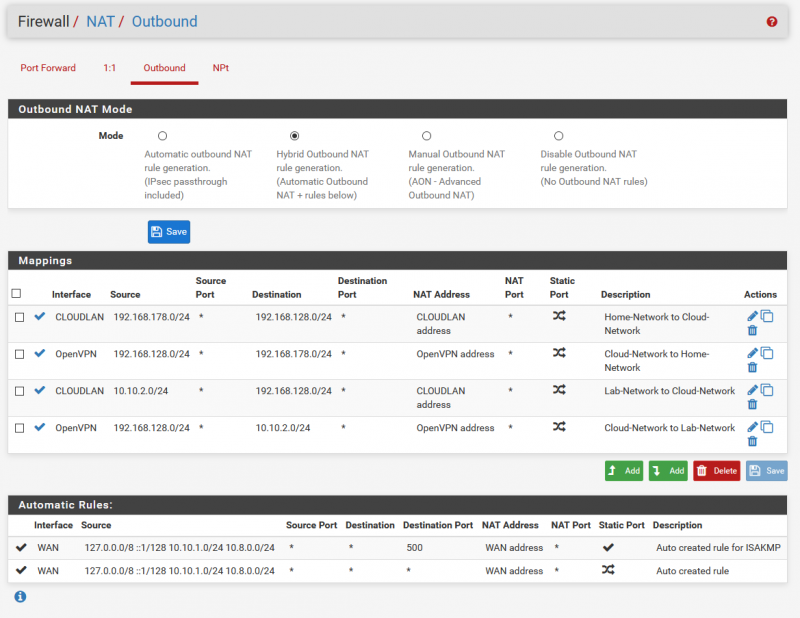
Also you certainly need to create firewall rules for certain service, e.g. DNS etc.
After that it should be possible to ping the “CLOUDLAN” interface. We have assigned the IP address for this in part 2 step 5. But remember, you certainly need to create a static route in your OS pointing to that network, using the IP of the Raspberry Pi as gateway!
Step 7 – To infinity and beyond!
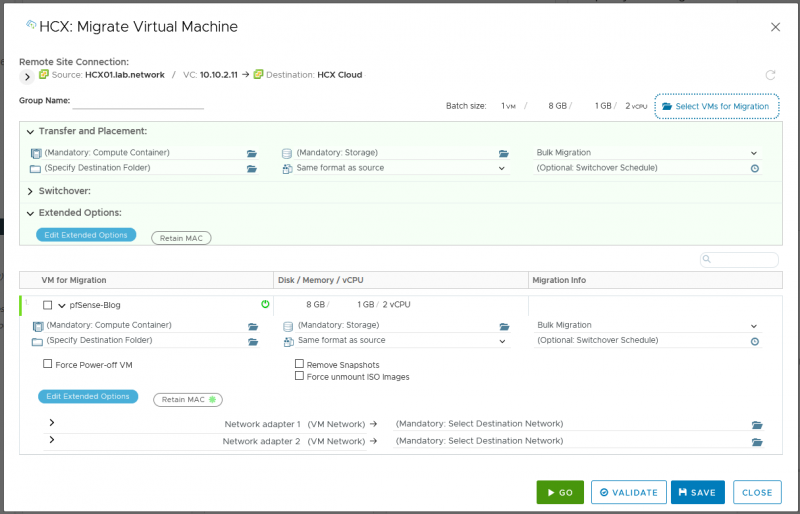
If everything works here, it is time to move the VM to the nested environment of the cloud. You can either export the VM as OVA/OVF and import it into the cloud, or as I did, initiate a migration with HCX. With HCX you can move the VM quite easily.
Once the migration is complete and you have configured the connection of the VM and its WAN interface to a network with Internet access, the tunnel will be established automatically. Without any further steps, such as a DHCP server that can distribute routes, static routes still need to be entered on the systems behind the VPN client. As soon as this is done, the access to the resources is successful.
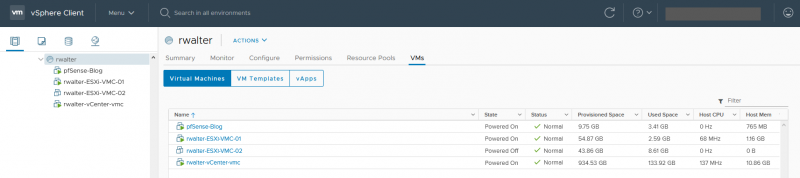
In my picture you can see ESXi hosts and a vCenter appliance.
Static route for VCSA on the shell:route add -net <network-IP> netmask <network-mask> gw <Gateway-IP> dev eth0
Static route for ESXi:esxcli network ip route ipv4 add -n <network-IP/network-mask> -g <gateway-IP>
In both cases, the gateway IP is the IP address of the CLOUDLAN adapter in pfSense.
More Information:
https://kb.vmware.com/s/article/2001426
End of Part 3
Now it’s done. Now that all steps have been carried out, the resources in the cloud, i.e. the virtualized ESXI hosts there, can be accessed via the created site-to-site VPN and the resource bottleneck is eliminated.
Of course, there are still several settings that can be implemented depending on the available configuration in the cloud, but all in all, this is a good start and should also give you an idea of what you could implement yourself.
This is the last part of the series and we have seen how to build a Raspberry Pi to an OpenVPN server and make it accessible over the internet. Furthermore we installed pfSense and configured the OpenVPN client including basic firewall and NAT rules, as well as static routes (!). Last but not least, we moved the created VM to the cloud. (With HCX, which is almost cheating, that’s how easy it works) and thus connected resources to the home lab infrastructure.